How to: Tweezer Pull (TP)
This manual advises what to consider and how to perform an optimal Tweezer Pull (TP) test, also known as Tweezer Peel test. This manual focuses on Pull testing using tweezers and obtain consistent results and the highest degree of quality assurance. Other pull tests, like Cold Bump Pull (CBP) testing can be found in a separate how-to.
This extensive how-to consists of 9 paragraphs. You can use the table of contents on the right to navigate between sections.
What is Tweezer Pull/Peel
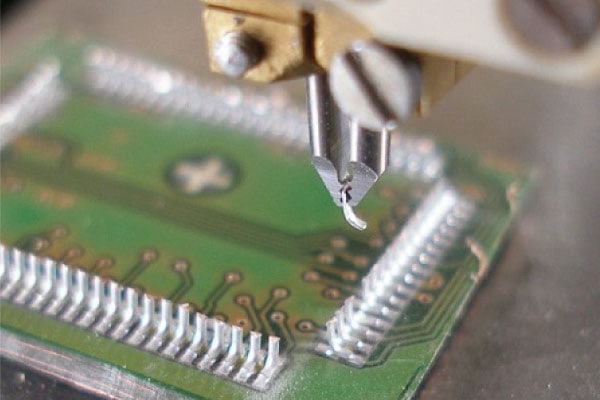
Tweezer pull is performing a pull test using tweezers. Tweezers are micro grippers that allow complete force control during opening and closing.
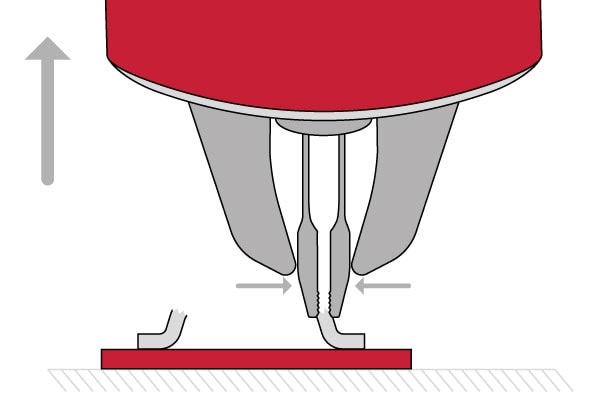
The tweezer holds a wire, a ribbon, or some other feature on the sample, then applies an upward force and effectively pulls away from the substrate. In some cases, it is necessary to prepare the sample before testing.
A peel test is essentially the same, but in addition to the vertical movement, the XY stage also performs a controlled lateral movement. The purpose is to maintain perpendicular force on the ribbon or wire being pulled off the substrate.
Tweezer design
Manual and automatic
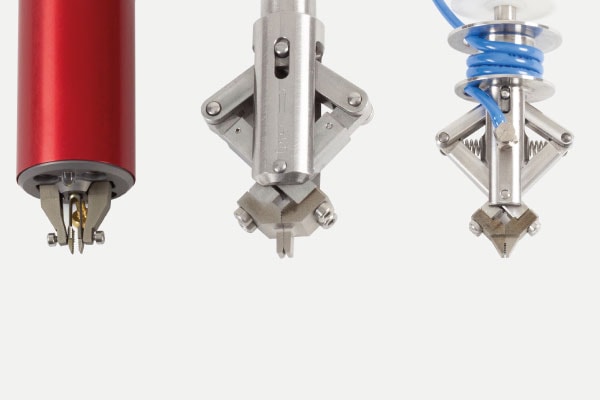
There are 3 types of Tweezers:
- Electric (USB) tweezers with programmable and traceable opening position and closing force
- Mechanical tweezers for manually opening and closing
- Pneumatical tweezers are controllable by software and opening by air
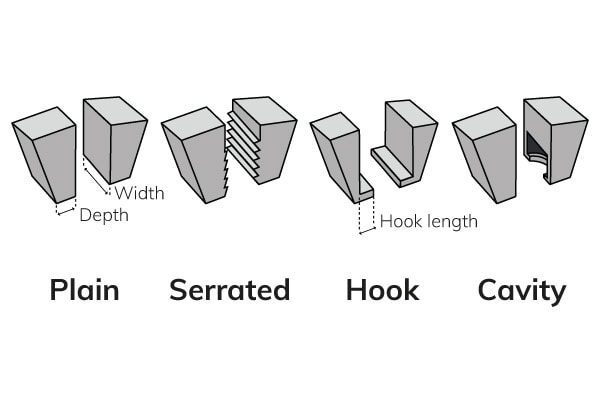
Types of jaws
There are many types of jaws to suit a wide range of applications. The most common are plain, serrated, hook, and cavity jaws.
Closing function
There are 3 types of closing functions to suit all applications:
- Increasing grip force
For gripping hard and parallel parts to maintain the grip as the pull force increases. - Constant grip force
Operators can input a defined grip force. This is ideal for gripping delicate parts to minimize sample deformation. - Fixed closing distance (closing position)
Jaw movement is defined by a prescribed open/close distance rather than a contact force.
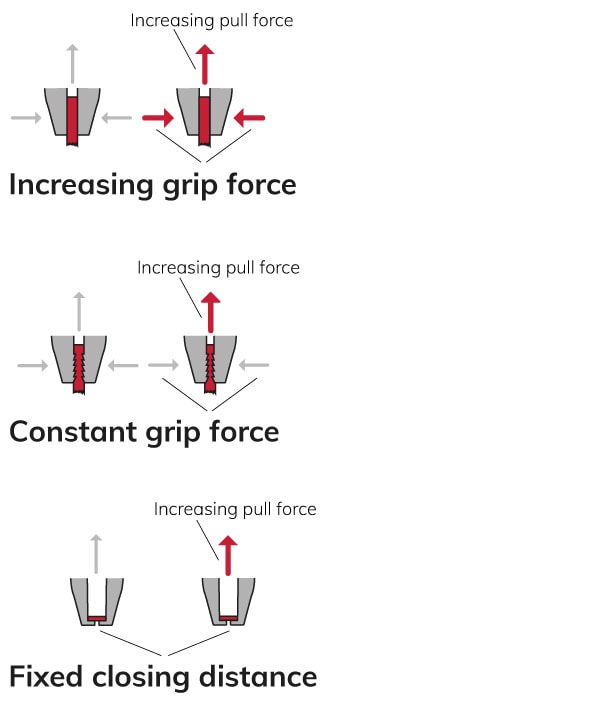
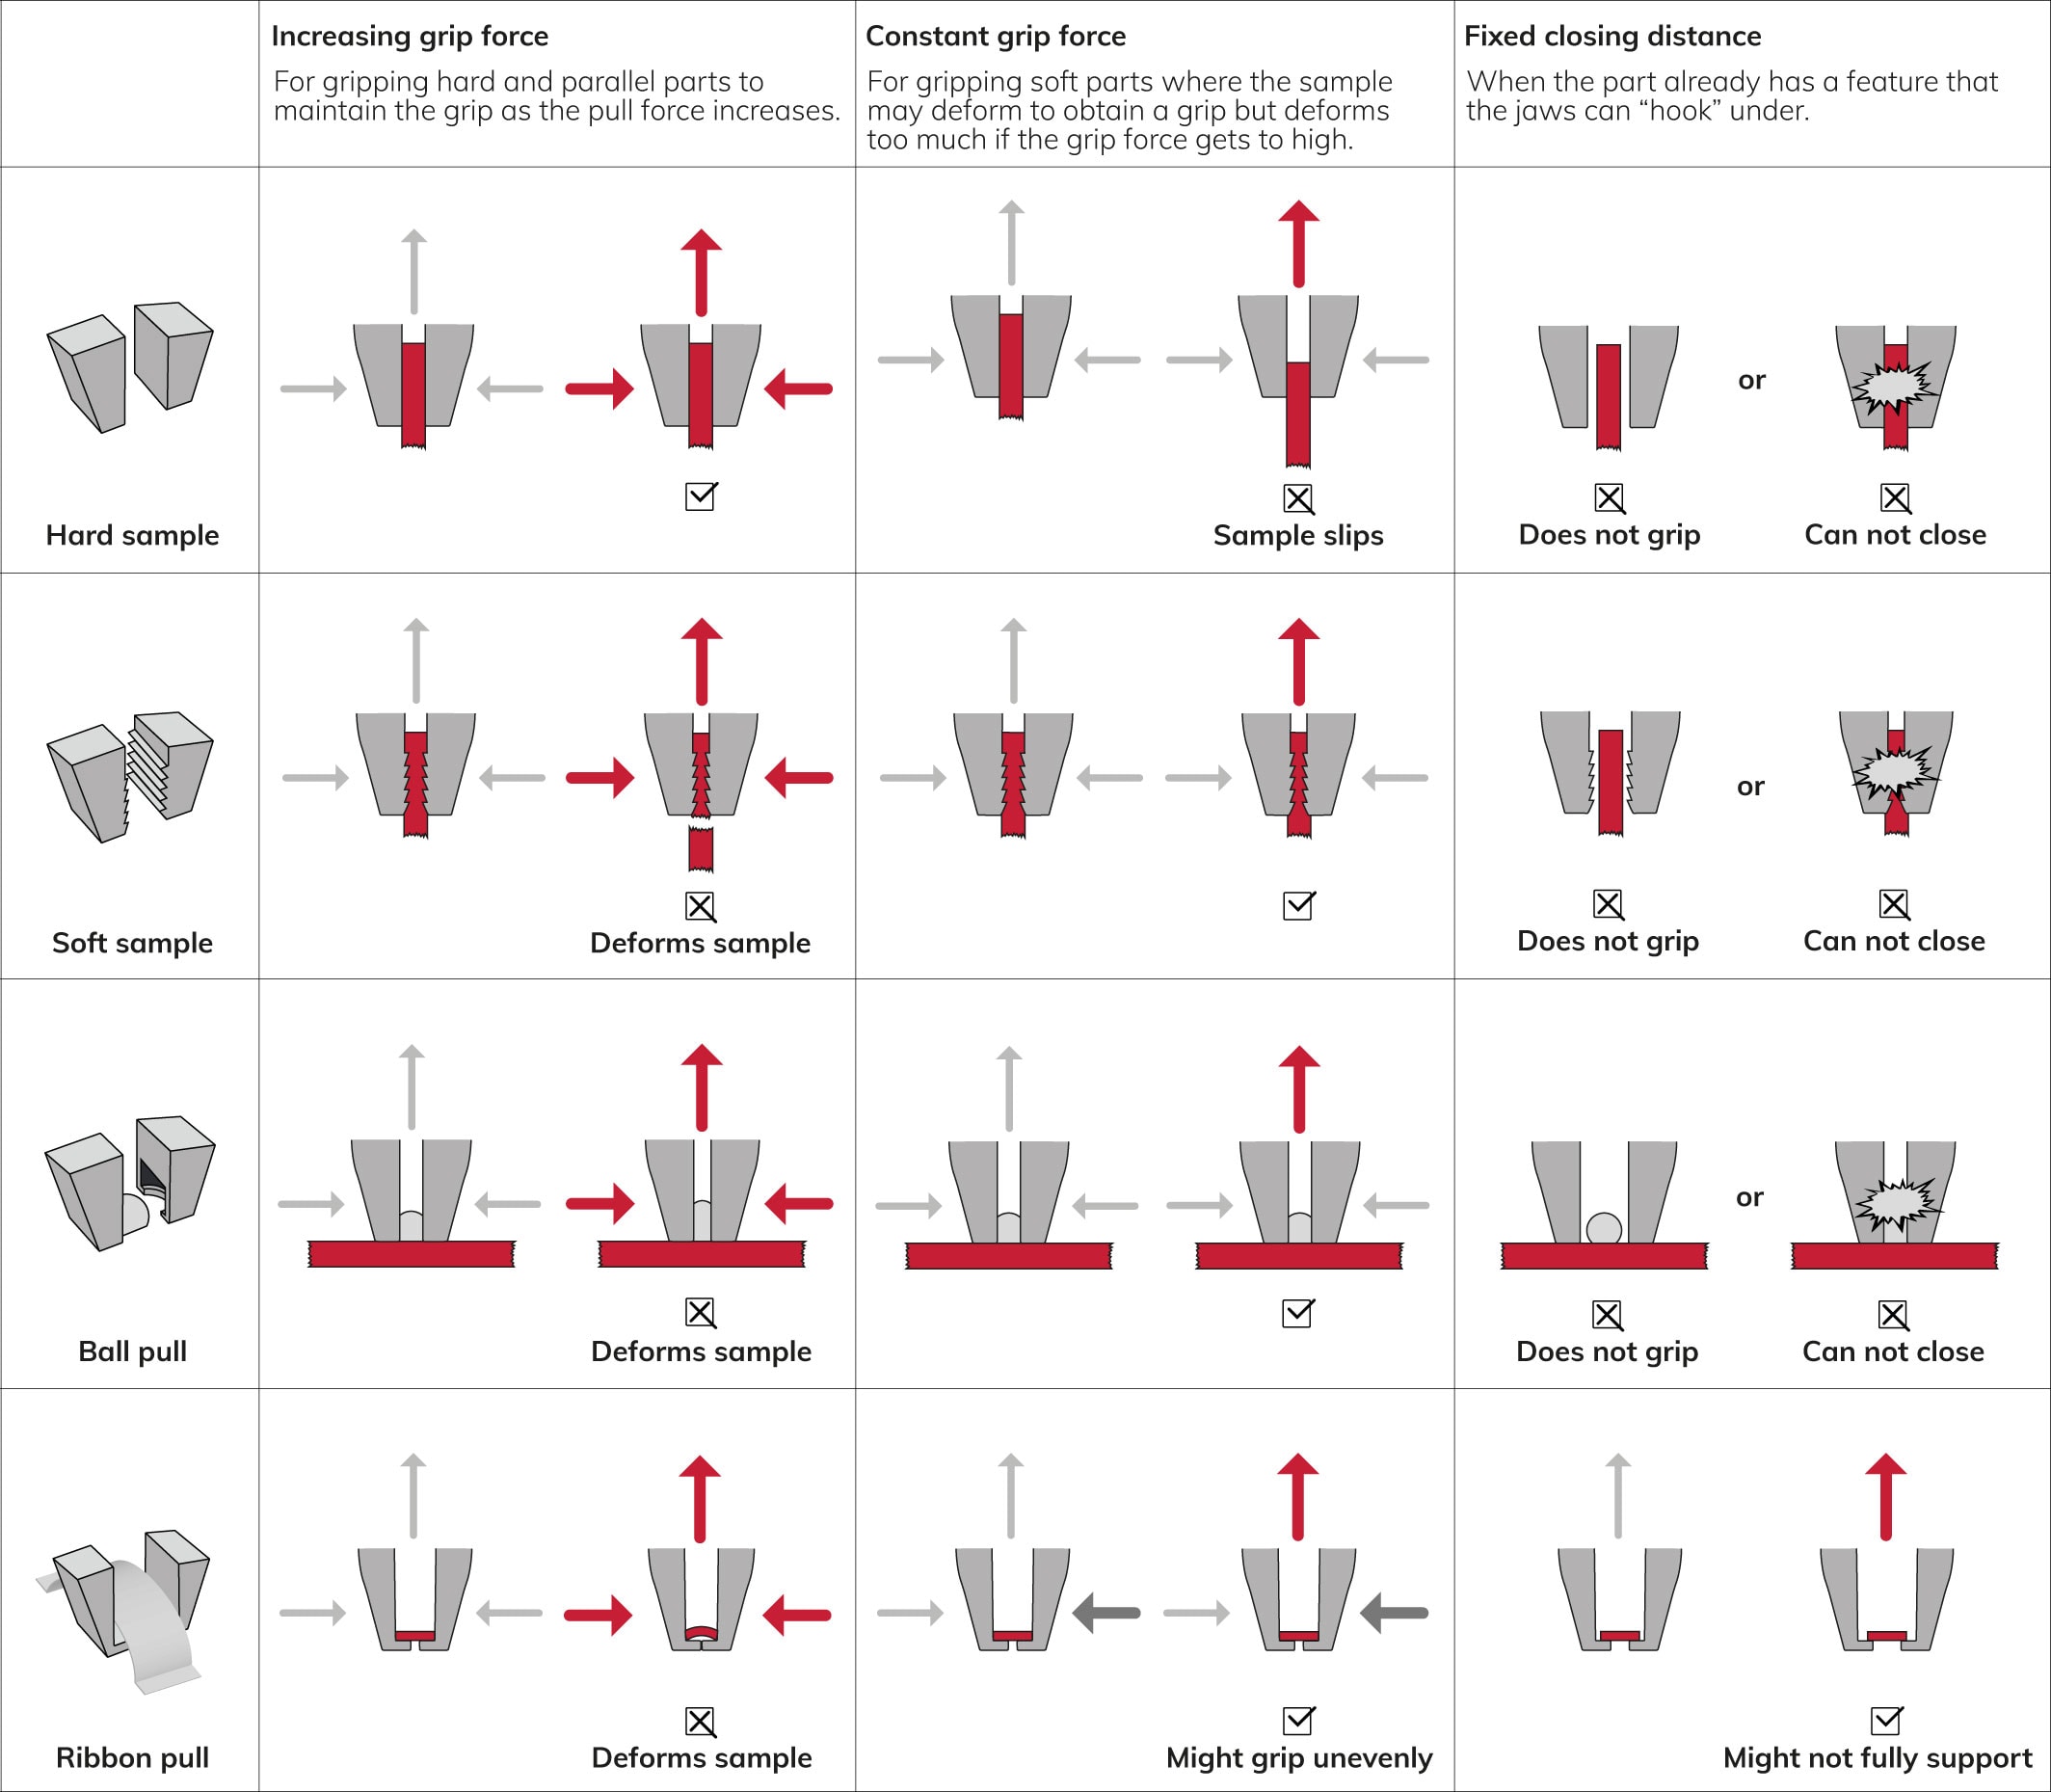
Increasing grip force as the pull force increases is typically used when gripping hard and parallel parts. This way, the grip is maintained as the pull force increases. A constant grip force, regardless of the increasing pull force, is useful when gripping soft parts, where the sample can be deformed to obtain a grip but squashed too much if the grip force gets too high. A fixed closing distance (or: closing position) is used when the part already has a feature that the jaws can “hook” under. You can use the following chart to select the type of hook your application requires.
Use the following chart to select the type of hook the application requires:
Material
The most common material for jaws is tough steel, i.e., tool steel. Hard material jaws are essential when the jaws require small detail and precise tolerances because smaller detail can be machined into these materials. The disadvantage of harder materials is that it makes the jaws brittle and fragile.
Quality
Damaged or worn jaws can influence the test. The amount of acceptable wear depends on the application. Any jaw damage is acceptable if:
- The failure mode of interest is still being produced by the testing
- The highest possible test force as with undamaged jaws
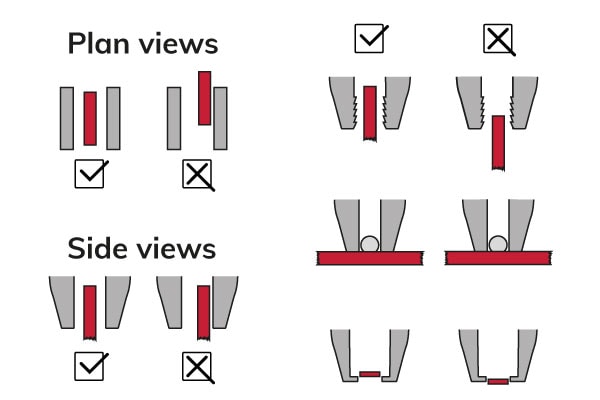
When the tips of the jaws close, they should align closely with each other. The same guidelines for acceptability exist for jaw alignment as for jaw damage. However, as a general guide, misalignment should be at most 5% of the jaw width.

Force control
Having precise control over the grip force of the tweezers is highly important to do a correct test on one bond tester and to maintain a correlation between tests on multiple machines.
Choose electric (USB) tweezers with intelligent jaws and built-in closed-loop force control to obtain consistent settings between multiple systems.
USB tweezer maximum clamping force is 8 kgf, This tweezer type is for use on pull/peel tests at or below 10 kgf of load.
Handle tips with care
Tweezer jaws tips can be fragile. To avoid damage, handle them with care and always store them in their cases when not being used.
USB Tweezers come in a safe case in a bracket. The bracket enables the operator to place the tips in the USB Tweezer and tighten the fixation screw without touching the fragile tips by hand.
Clean the tips with extreme care in case of contamination. Using a contactless CBP Jaw Cleaner to eliminate the risk of damage when cleaning the cavities is best.
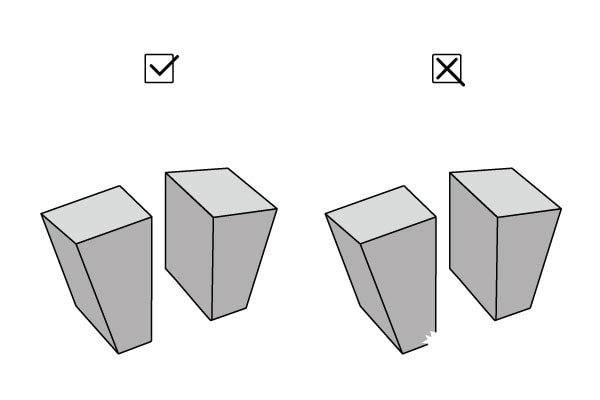
Alignment
Precise tool alignment is essential. Align the tweezer jaws centrally to the sample and engage the jaw features like serrations, hooks, or cavities correctly in the vertical axis to get the best results. Sigma bond testers have vision technology for automatic alignment to minimize handling errors.
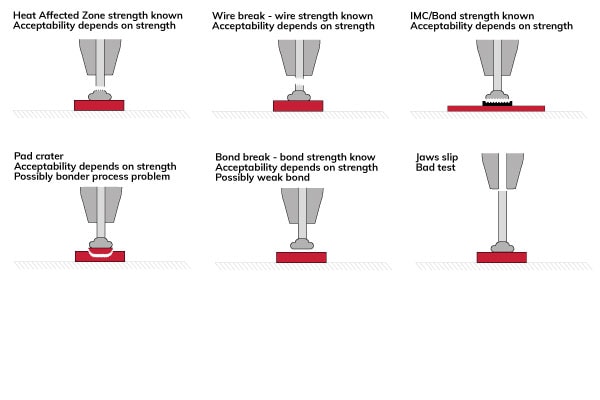
Gold wire Tweezer Pull failure modes
Here we list the most common failure modes for gold wire tweezer pull. We also refer to our grading library, where you can download result codes.
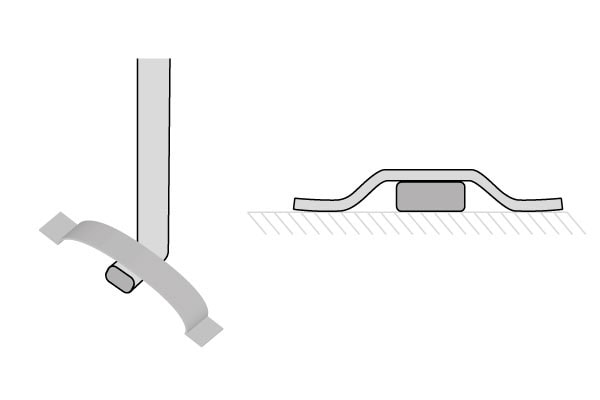
Ribbon pull
Tweezers are a possible solution for ribbon pull because the tweezer jaws distribute the load evenly under the ribbon loop. However, a pull test with a flat or offset hook will also effectively keep the pull force on the center of the bond.

Ribbon loop heights are often very low, and a hook of sufficient strength may not fit. Special hooks can help, but the tweezer solution is often a good way to overcome loop clearance limitations.
Peel testing
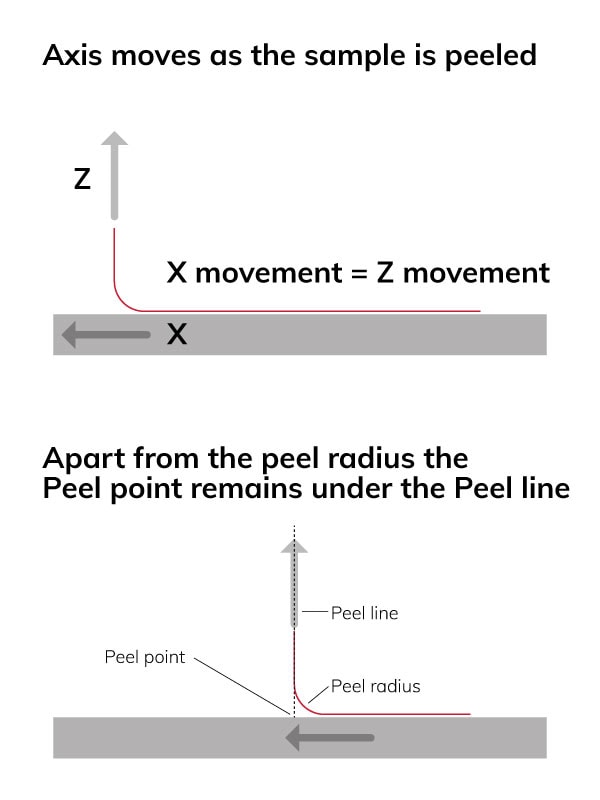
Perpendicular
The principle of a peel test is to move 2 axes at the same time. This is typically the Z axis and either the X or Y axis. Therefore, the best tool to perform peel tests is tweezers.
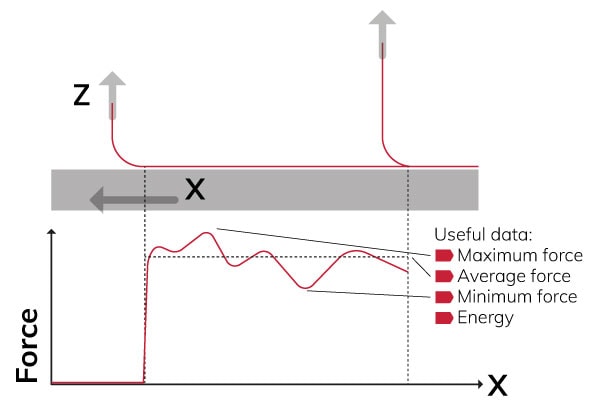
The following schematic outlines how this works when the objective is to keep the angle of the pull force perpendicular to the sample. The result is a 90 degree peel test.
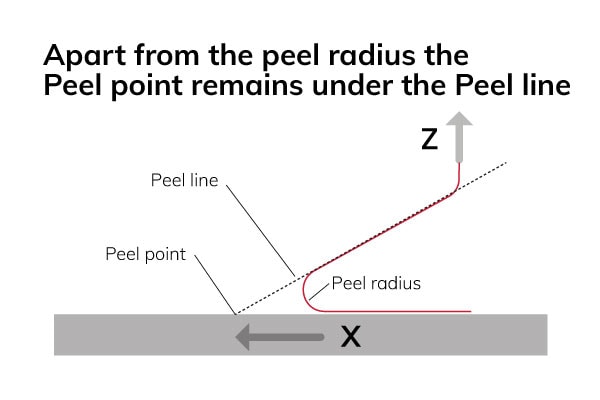
Angled peels
Less common are angled peels. The movement shown in the X is not equal to the upward movement. Backward peeling decreases the lifting force on the sample and can be useful testing thin substrates that tend to bend upwards.
Results
The results from a peel test often require more analysis than a simple pull or shear test. The useful data in the force/displacement graph can consist of the maximum (peak) force, the average force, the minimum force, or the energy. A bond tester with a good SPC package gives all these results directly after a test.
Copper pillar
There are multiple ways to test copper pillars. The best method depends on the failure mode of interest and the construction of the sample.
Solder to copper
It depends on the shape of the construction whether a Cold Bump Pull (CBP) type test or a shear test is feasible to qualify the process.
Below is the test sequence for the Cold Bump Pull test:
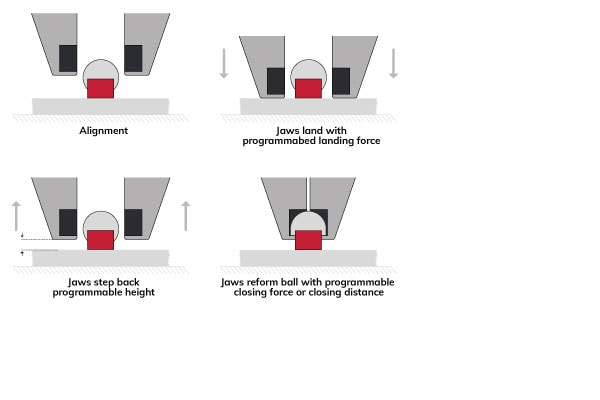
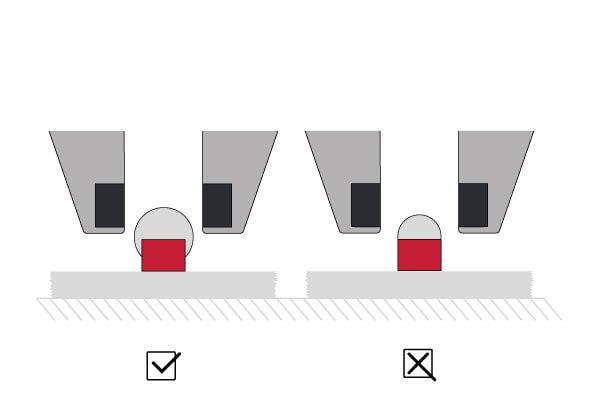
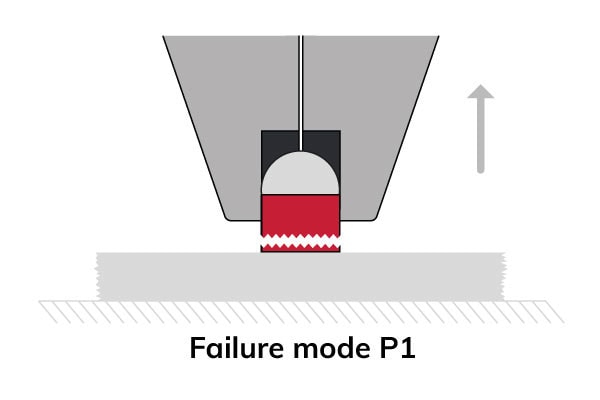
Choosing either a closing distance or constant closing force on the tweezer jaws depends on which method produces the most failure modes of interest or the highest force. The failure modes are:
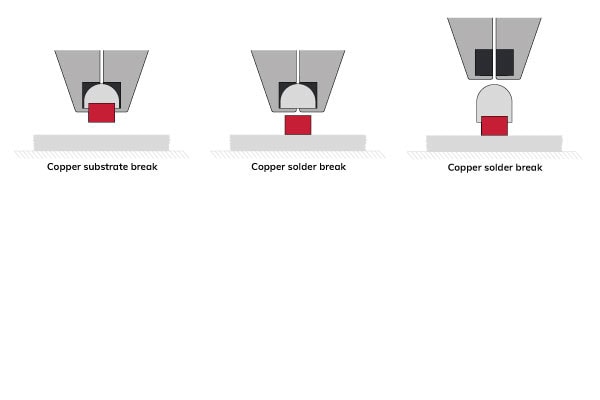
Copper-to-substrate breaks are a common failure mode. The copper’s bond strength and failure mode to the substrate pad are known when this happens. Copper solder break is not so common and probably indicates a non-wet. Copper extrusions indicate strong bonds.
Below is the test sequence for the shear test:

This how-to focuses on tweezer pull tests only. Click to read more about the copper pillar and the rationale behind the top landing.
Copper to pad
A pull and a shear test can produce the failure mode of interest between the copper and the pad. The preference for process control is often for pull testing because the bond is subjected to a simple tensile load, distributed over the bond area. Unlike solder bumps, copper is relatively hard, and gripping it is easier.
Solder balls require precise reforming to apply a meaningful test load onto the bond. Copper also needs reforming to be able to grip it, but this takes the form of well-known gripping methods such as plain surfaces and friction, a few serrations that slightly reform the copper to get a mechanical grip or a slight taper.
| SEQUENCE | RESULT | FAILURE MODE |
| 1 | 30.8950 g | P1 |
| 2 | 28.7756 g | P1 |
| 3 | 38.5604 g | P1 |
| 4 | 39.8527 g | P1 |
| 5 | 28.8891 g | P1 |
| 6 | 34.6535 g | P1 |
| 7 | 38.7797 g | P1 |
| 8 | 42.4205 g | P1 |
| 9 | 33.4713 g | P1 |
| 10 | 39.9420 g | P1 |
| AVERAGE | 35.6240 g | |
| StdDev | 4.9610 g |
Stud Pull / Pick and Place
There are many approaches to stud pull. The principle with stud pull testing is to make an adhesive connection with the carrier (or test object) with glue stronger than the bond that needs to be tested.
It is possible to provide a Sigma bond tester with a micro dispenser that dispenses tiny drops of glue (microliter amounts) very accurately and cures with UV light. Using USB Tweezer and unique tips, it is possible to automatically take a glass stud from a magazine and place it with a predefined pressure on the surface with the glue.
Sigma bond tester
A Sigma bond tester is the most advanced bondtester for solder ball testing. It comes with game-changing automation capabilities and high specifications in:
- Sensor accuracy and resolution
- Large X stage
- Superior axis speed
- Cameras and illumination
- Future proof and modular design
Contact us and challenge us to customize a bond tester to solve your quality control processes.